Friday, October 5, 2012

Day 5- Making signs with stickers


We've covered where to find your wood, supplies, and making signs with your own or pre-made stencils.

Today I'm going to talk about using stickers to make signs. This is a super easy way to make them, if you don't have a cutting machine and/or don't want to spend the time that using them or pre-made stencils takes.

 Look for ones that are raised or material other than normal flat stickers.

Here's a few examples of the stickers I have used to make signs and where I've found them.


These foam stickers I found at the Dollar Tree:


Here are a few signs I've made with them.


I even used some foam leaf stickers for the fall signs


I "love" this one, and also made one that says hope! I wish I had somewhere that these could go!

These scrapbook letters are adorable on their own (hard to tell but they are sparkly!), but do well for signs too. I found them at a craft store....maybe Michael's? I can't remember! (Don't forget to look for clearance stickers or use coupons!). They are perfect for this because they are really sticky, but can easily be removed and reused. And they are sort of like a cardboard material.


Here's how I made a sign with these stickers- truly it's as easy as paint wood, place stickers, paint wood, remove stickers! But let's go a little more into details with pictures so you can get a good idea if this is an option for you!

*Spray paint is going to be your easiest option with these. You can try with a brush and paint, but it'll be harder to get around the letters!*

1. Take your piece of wood and spray paint the whole thing. It doesn't have to be perfectly covered, just enough to cover where you'll put your wording and where you want to hit it with some distressing.

2. Place the stickers on in the word/design you have chosen.


3. Spray paint at least one coat over the top of your stickers. If you are going for full coverage, you may need to wait and spray a second coat after the first dries. My wood was pretty rough, which I wanted it to be, so I only did one coat since it probably would've taken too much paint to cover it fully anyways!


4. Wait for it to dry, then pull off your letters.


5. Distress if desired. Mine was rough enough already.


This is where you are done unless you are adding an embelishment like I did. I simply hot glued on a shell since I'd (purposely!) off centered my word. I thought just the word beach needed a little something extra!

It literally took me longer to write this post (drying time included!) than it did to make this sign! Soooo easy! Such a great option if you want a custom made sign but don't want to do a lot of work!

For now this sign is hanging out on a shelf in my living room, but it's also going to be up for sale! I list all of my signs for sale on my facebook page since I just don't have the time to keep up with etsy listings right now!!


I have 8 of these shelves and they are in need of a re-do since they all have pictures of my oldest daughter from her 2 yr old party!

Hope you will get some use out of this sign tutorial! It's so easy!

We've still got a few more posts to go on different ways to make signs!


Check out all the other posts in my 31 day series on making signs.

 
Day 1- Where to find wood


I sometimes link up to these lovely ladies' parties:
shabby creek cottage
IhookedupwithHoHlamespicePhotobucket


Thursday, October 4, 2012

Day 4 - Making Signs with Pre-made Stencils


So far, in this 31 day series we've discussed:

Finding your wood
Gathering your supplies
and
Making your own stencils

Today, we're going to talk about using pre-made stencils.

Stencils have come a long way. You can find all different kinds and designs in many different stores and online.  They can sometimes be a pain to work with, so we'll talk about a few tips to make it easier.


I found these stencils at a yard sale so I can't recommend where to get them, but they aren't the typical block stencils that leave gaps in letters.


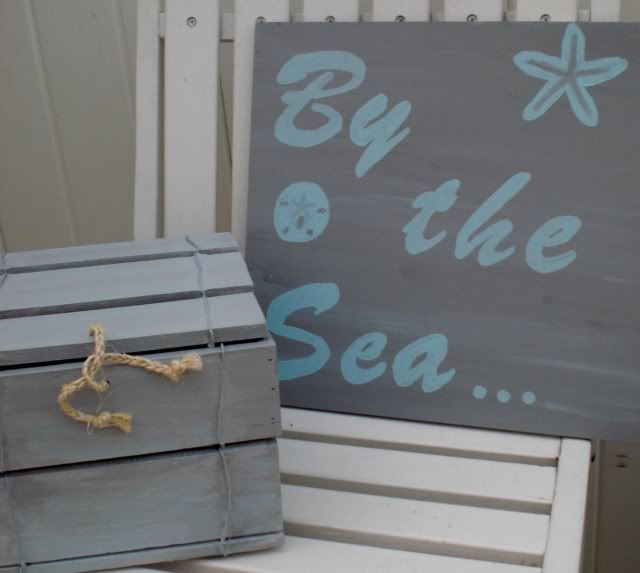
Here is the only sign I've made with them so far.....


I put it above my kitchen cabinets to help start bringing in some of the grey that I just used to paint the dining room. I free-handed the starfish and the sand dollar because I didn't have the next set I'll show you yet.


These picture stencils I found at the Dollar Tree! Some of them are quite kiddish looking, but that may be the look you are going for anyways! I liked them for the beachy stencils!


Here is one little sign I made with these stencils and two wood shims glued together. I whitewashed the shims  a bit to give it a beachy weathered look.


It is hanging in my guest room, here's a peek at my gallery wall in this room where I hung it.


Stacey at Embracing Change (I love her name, Stacey....teehee!) does a great job using stencils....here's one of my favorite projects she's done with them.


Here's my tips for using stencils.

  1. Paint your background your desired color(s) first.
  2. Prep your stencils with a little bit of spray adhesive if you are working with a rougher wood, if you let it dry for a bit, it should be tacky and not wet and not leave a residue on your sign.
  3. Place your stencil and tap the paint on with a foam brush or a brush specific to stenciling, don't use strokes as you can push the paint underneath your stencil.
  4. Use as little amount of paint as possible! Better to do it twice than to use too much and have it seep under.
  5. Remove your stencil smoothly so you don't drag any paint.
  6. If your next letter/design will make the stencil edges overlap your first....wait for the first to dry.
  7. If you have to use the same letter/design more than once, wipe it dry, or wash it off so you don't smear the previous paint onto your sign. You can also wait for it to dry but if you get too much dried paint around the edges, it may start to not lay flat.
  8. Distressing can help hide (or sand away!) mistakes.
  9. Touch up with your background color if any of your letters get too messy. You could possibly even repaint over a section and go back and re-do whatever part messed up without having to redo the whole thing.


If you use stencils like the ones in Stacey's sign  I showed above, and if you have a steady hand, you can always go back and fill in those little lines to make your letters look more complete. Sometimes the look of stenciled letters can be cute, and sometimes you want a more finished look.


Check out the rest of my 31 day series on making signs here:

 
Day 1- Where to find wood


I sometimes link up to these lovely ladies' parties:

Wednesday, October 3, 2012

Day 3 - Making Signs with Your own Stencils


So you've got your wood, and your paint and some other supplies......

Now you need to figure out what method you are going to use to make your design on your signs.

Today I'm going to talk about making your own stencils. Some of you will hate this post since I'm talking about using a craft cutter, and you can't afford one! But don't worry- I'm going to discuss some other ways to make signs during this week. Some that are even easier!

Don't just skip this post if you don't have a Silhouette or Cricut, though! You can make your own stencils without one if you have patience!

Making a paper stencil without a craft cutter

To make your stencil-
  1. Make your design on the computer.
  2. Print it out (use a thicker paper, card stock, etc.).
  3. Cut it out with an exacto knife (may be tedious, but if you have patience you can get great results!) Keep all the insides of your letters like the o's and e's!

To make your sign-
  1. Paint the background color on your piece of wood.
  2. To prevent bleed-under use a slight amount of spray adhesive or lightly apply a glue stick on the back.
  3.  Place the stencil on your wood in desired position- use painters tape on edges to keep it still.
  4. Don't forget the insides of your letters! Use a glue stick to lightly apply them, enough they will stay, but not too much so you can pull them off!
  5. Paint inside the stencil to paint your words/design on your sign. It's better to dab the paint than brush it on which will push the paint under the stencil.  A foam brush may be better for this job than a bristle one.
  6. Use the least amount of paint possible! Tap most of the paint off your brush. The less you use, the less likely you'll get paint running under your stencil.
  7. If you are using spray paint, make sure the rest of the sign is completely covered- if your stencil doesn't completely cover it, use newspaper and painters tape. Spray LIGHTLY! Use more than one coat if necessary. The heavier you spray the more likely you will bleed under.
  8. Either wait until the paint completely dries, or pull the stencil up immediately
*This method may not create a perfect design, but you can even have problems getting designs perfect with other methods. If you are planning to distress your sign anyways, it probably won't matter, and you can always touch up with your background color paint after you take the stencil off.

 
Making your own stencils with a craft cutter

If you've been reading home decor or crafting blogs for any length of time, you've probably heard the words Silhouette or Cricut thrown around a lot! Especially in the last two years! I heard about the Silhouette SO much, that I just had to get one for myself! Even though it can cost around $200, I can tell you now that in one year, my machine MORE than paid for itself in the money I saved making my own cards and gifts! Not even counting the things that I have made and sold! That has made it even more worth it!

I have an older model, which I'm considering replacing soon since the newest edition of the Silhouette- the Cameo- has a lot better features.  So if you've waited to get one, you'll get a better one! Around the holidays, there are always tons of great sales. I'll try to post when those are happening so you can get your hands on one! Usually along with the sales are lots of giveaways for a chance to win a machine and lots of stuff to go with it! Just don't buy it direct from their website without a code! You'll pay too much!

This thing can cut paper, vinyl, contact paper, fabric, and the possibilities are endless! See here to learn more about it! There are other cutting machines out there, but I don't have experience with them. You can see a comparison of Silhouette vs Cricut here.


So, maybe you have a craft cutting machine but haven't used it for stencils yet! Let's learn how to make stencils for our sign painting!

 
Making a sign from your craft cutter stencil

This is how I make most of my signs


To make your stencil using the positive space (the actual letters/design)
  1. Design your stencil in your machine's software program.
  2. Cut your design out on vinyl or contact paper. I highly suggest contact paper as it's cheaper and comes in bigger rolls than vinyl! Clear will work, but I buy mine at Target and buy a big roll of white contact paper- it's just like vinyl and costs under $6 for a huge roll vs $10 on a few sheets of vinyl. Clear doesn't always stick as well, especially if you try to move it around. Save your actual vinyl for projects that will be keeping the vinyl on them. You'll throw away your stencils after using them!
  3. If you use a full sheet of contact paper/vinyl, you don't have to use your mat! Took me awhile to realize that. Your machine should mostly just cut through the vinyl layer and leave the backing intact.
  4. Remove your negative space from the stencil (the paper that surrounds what you cut out)- leave the letters or design behind.
To make your sign:


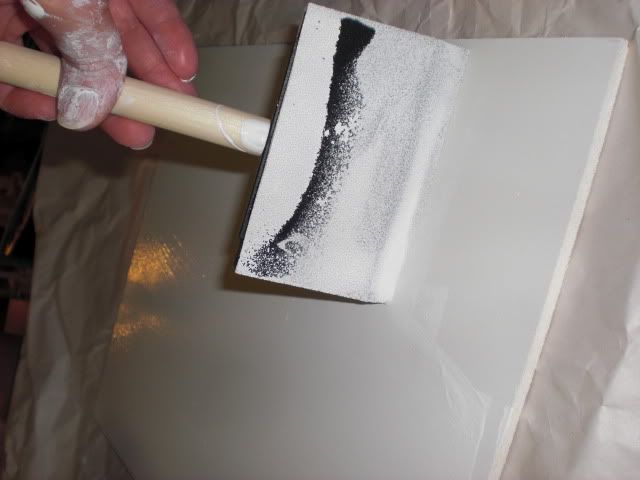
1. Paint your sign the color you want your letters (I'm using a brush and latex paint here just because it's cheaper than spray paint and I hate the cheap white paint).
 
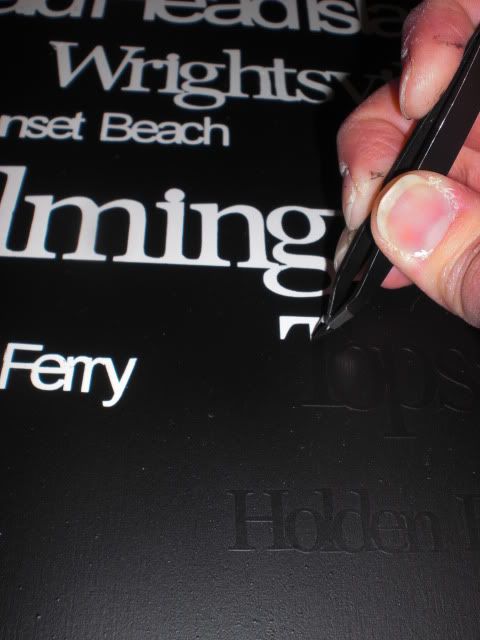
2. Place your cut out letters or design.....I used to use the transfer paper, but it was just too many steps! For an intricate design, I'll still use it, but for a basic sign, I just lift and place my letters with my exacto knife or tweezers. Vinyl or the white contact paper is easy to move around a little if you don't get things straight.
 
 
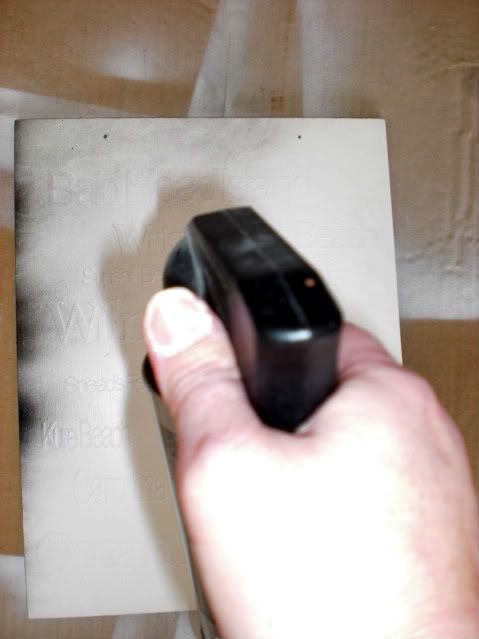
3. Spray paint over your letters and your entire board.  Spray lightly, you can always do more than one coat, and you'll probably need more than one coat, especially if you don't plan on distressing. This is your background color! (To be really sure you don't get any bleeding you can paint over the letters first with the color they will be once you peel them off, this can help to seal them!) If you plan to distress, you won't need to put it on as thick, since you'll want to sand some off anyways!


4. Wait for it to dry when you are using the positive space like this! Otherwise you'll be smearing the paint onto the letters. Then pull off the letters carefully with a weeding tool (comes with your machine or sold as an accessory), sharp tweezers, an exacto knife, or even your fingernails if you are doing large letters. For lots of small letters, I definitely recommend using  tool, it'll go a lot faster.
 
5. Flip and spray the back and sides as well if you want. Depends on your preference!
 
6.Once dry, distress, if desired, with a high grit sandpaper (use a high number, I usually use over 100, too much lower and it'll just look scratched). Hit it in areas it would naturally distress over time, like the edges and a bit across the letters. It's all up to you how much or how little. 
 
7. Here's where you are finished, unless you want to seal it and/or hang it. See supplies for ways to seal your sign. You can use a drill to make holes and string jute, twine, or ribbon through your sign, or you can use sawtooth hangers on the back so you can hang it on a wall.


To see more examples of using the positive space, visit these ladies......


To make a sign using the negative space (the space around the letters/design)-

1. You can use just the negative space, or use the leftover negative space from the project above that you just used to make your previous sign.

2. Be sure to hold onto the insides of all the letters (like the o's and e's so that you can finish off those letters!

3. Peel off the stencil, place on your sign, then go back and fill in all the centers of your letters.


4. Infarrantly Creative's Beckie suggests sealing the edges with mod podge on a rough board.

5. Paint with spray paint or dab on as noted in the first tutorial above. As soon as I have my paint on evenly, I usually rip off the stencil immediately if I can do it all in one big movement. This helps prevent the stencil from pushing paint underneath as it dries. Then I usually just leave the insides of the letters until it's dry, so I don't smear the paint under them.


Here, I used the negative space since I needed to paint
two different colors and needed to brush them on. This is a sign I made for a friend.
 
 
Hopefully the "negative" vs. "positive" thing makes sense! Remember the negative is the outside, and the positive is the inside- what you are actually cutting!
 
If you have any questions, or think I should clarify any instructions better please let me know!!
 
Keep coming back the rest of the week for more sign making methods!
 
Check out the rest of my 31 days of making wood signs posts:
 
Day 1- Where to find wood


I sometimes party at these lovely ladies' places......


Tip Junkie handmade projects My Uncommon Slice of Suburbia


HouseofHepworths  Join  us Saturdays at tatertotsandjello.com for the weekend wrap   up           party!
Funky Junk's Saturday Nite Special


Tuesday, October 2, 2012

Day 2: Gathering your supplies


Now that you’ve got your wood selected, what else do you need?
Paint
My stash of oops paints!
 
1.       Latex paints
·    Buy oops paint from home improvement stores, usually near the back of the paint counter. They are paints that the color wasn’t made correctly so customers didn’t buy them and they are heavily discounted so they’ll move out! Sample pots are $.50- $1.50, quarts are usually $3 or less, and gallons are usually under $5
·    You could use oil based paints, but they don’t clean up easily so I like to stick to latex, plus you’ll find latex in oops paints more often!
·    If you need a specific color, a sample pot for about $3 will last for a long time for sign-making.
 
My spray paint stash

      2.       Spray Paint
·    Don’t bother with the cheapo $.99 cans! You’ll end up using a lot more, and they don’t work that well! Trust me, I’ve tried them out! Especially the white is bad….terrible coverage.  The black from Walmart is horrible, but the black $.99 cans from Home Depot are ok.  If you are doing something small, they may work for you, but I really do recommend going for better quality.
·    Rustoleum is my FAVORITE (from Home Depot).  I’ve never had a problem with drips, coverage, etc! It’s the brand I usually use, but I do hear good things about Krylon and Valspar- especially Krylon.
·    It’s your fastest option. You are limited in color choices with spray paint, but painting signs goes SOOO quickly! If I’m doing several in the same colors, I’ll do them all at once!

·    If you use contrasting colors and don’t go too heavy on the top layer, you can easily distress to see the color below.
·    Your best option for purchasing these is at Home Improvement stores. Even with coupons, they are usually more expensive at a craft store like Hobby Lobby or Michael’s.
·    Even though spray paint is probably my most expensive option I use for paint, it’s totally worth it when I can blast through several projects at once. I use spray paint for way more than just signs!
·    Always use precautions, paint in a well-ventilated area and use a mask. Also read the can to be aware of the best weather conditions for spray painting! They are for a reason! This is why it’s good to have other painting options because when it’s too hot or too cold, spray paint can look awful! It’s also nice to have other options when you are pregnant, like I just was! Even with a mask it’s not a good idea!
 
 
3.       Acrylic paints
·    Find these small bottles easily at craft stores or places like Walmart.
·    Look for bottles on clearance, on sale, or use a craft store coupon.  They are usually pretty cheap to begin with, but cheaper can’t hurt, right?!
·    These are a great option when you only need a small amount of a specific color because some brands are around $1!
 
Source - you can buy it here too!
4.       Chalk paint or milk paint
·    If you aren’t much of a home décor blog reader, these paints might be new to you.  If you’ve been around this blog circle for even a little while, I’m sure you know all about it and can skip my descriptions!
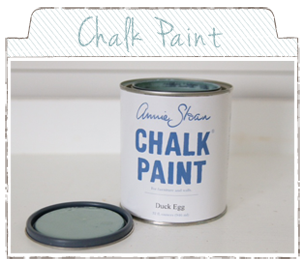
·    Chalk paint- Annie Sloan Chalk Paint, CeCeCaldwell’s Chalk & Clay Paint are the biggest kids on the block, and there is also Masion Blanche  a new one I don't know much about but hope to soon. It’s mostly used for furniture, but it distresses so easily that it’s perfect for signs! There’s no prep work involved (which is why it’s so great for furniture, other than sanding splintery edges or cleaning up old wood, there’s not usually much prep work for signs.)
·    There are also DIY versions which I’ve never tested on furniture, but have used for signs and I love this post which compares Annie Sloan and DIY. I’ve also used CeCe’s for a few small projects and am about to use it for my dining room table.
·    Milk paint- Miss Mustard Seed can tell you all you need to know about milk paint, and she’s  made some signs with it. It’s a powder based paint that you mix with water.  She has just come out with her own line and I’m hoping to get my hands on a sample soon. It’s supposed to distress really well too and not require much prep. Again mostly designed for furniture but also great for signs.
 
5.       Stains
·    Use one of the above options for lettering or other designs, and use a stain before or after.
·    I’ve used several oops stains for different signs that turned out great. I especially like it on fence post signs.
·    Use a pickling stain (for a white color)
·    Use a weathered barnboard stain to make a faux barn wood look on new wood.
 
6.       Sealants
·    I’m including these under paints because they are found in the same aisles! If you want a time or weather worn sign and don’t mind it getting any abuse (if it will at all, most signs should be out of the way!), you can seal it with many different options.
·    Polyurethane- this can be found in a quart or in a spray can.  I do seal my signs that I sell and I use this most often in spray form, because it’s quick and easy. It will most likely YELLOW WHITE PAINT! I learned that the hard way. Supposedly if you do several very, very thin coats won’t, but I haven’t tried it ever since I found some of my signs yellowed, fortunately I often used white as the lettering color and they didn’t get hit to hard.
·    Polycrylics- these shouldn’t yellow your white paint and come in spray and quarts. I’ve done a lot of research on the two and apparently it can yellow sometimes but shouldn’t if you get a sealant that is water-based and does not contain “urethanes.”
·   Wax- waxes are also a great idea. Learn more about how to apply a wax here.
 
Other supplies
These will vary on the type of sign you are making, and this list is just somewhere for you to start. I’ll update the post on ways to make signs next to the different supplies after we go over them this week!
·         A craft cutter- Cricut, Silhouette machine etc.
·         Printer- Ink jet for transfer projects, laser for tracing or making your own stencils is fine
·         Vinyl or contact paper
·         Exacto knife to cut your own stencils if you don’t have a cutter
·         Pencil for pencil transfers, sharpie to free hand or fill in letters.
·         Carbon paper and tracing utensil
·         Twine, ribbon, drill to make holes for threaded hanging, or sawtooth hangers 
·         Paint brushes – cheap foam brushes work well and if you wash them immediately, you can 
          often use them again. For some techniques you may want to invest in good brushes like a
          Purdy brush (they don’t lose their bristles!)
·         Sand paper- low grit (60, 80) for sanding splintery edges and smoothing a really rough
           surface; high grit (180 +) for distressing. I don’t think you need a sander just for signs.  It
           can make things go faster, but you can also sand too quickly and sand too much!
·         Newspaper, drop cloth, old sheets- something to cover your work surface
·         Paper cups, paper plates- I use these to mix my pants and to create a palate of blended 
           colors.

·         Spray adhesive, mod podge, painter's tape and/or glue stick to hold stencils in place
 
Got any other supplies you use to make signs? Leave a comment! I’ll be adding in some more supplies as we go over methods throughout the week!
Check out all my 31 days of signs posts so far!
 

Monday, October 1, 2012

Day 1- Where to find wood


So you want to start making some wooden signs? Let's talk about what to start with- the wood of, course.

We'll be discussing lots of inspiration, other supplies and methods to make them later, but you've gotta get your base first!


Where to find wood for your signs:


Home Depot Lumber Aisle (source)

1. Home Improvement stores-
  • 2 x 4's etc, luan boards, mdf - usually the store will cut them for you for free! I've had luan and mdf cut into 8x10's or 11x14's. And long boards cut into several sections. They say that they charge after a few cuts, but I have never ever been charged at any Home Depot I've ever visited- your experience could vary.
  • Fence posts - love these for textured signs
  • Cabinet doors
  • Scrap wood- can be found on the "cull cart" usually in the back of the store near the saw for long boards and is often wood that was cut for someone else but the measurements were wrong. (You can't exactly guarantee that their measurements will be perfect when they do them for you! If you need absolutely perfect cuts, you may want to invest in a saw of your own, usually they get close enough for sign making!)
  • Paint sticks - only take these if you are buying paint! They actually moved them at my Home Depot to where only they can reach them!
  • Wood shims - these are slightly angled, but two put together make one small even board
  • Other options- just take a walk around the store for inspiration, textures, shapes and sizes of all kinds of wood!


Adventures in Creating's Pallet sign (source)

2. Pallet wood
  • Pallet wood is all the rage these days....if you happen to have access to safe, clean pallets that can easily be taken apart, they can be a great option.
  • Be aware that there are dangers to dealing with pallets, so take caution. They're not an option I've ever used because I haven't found a good place to get safe ones. Definitely avoid food related pallets and read more about dangers and precautions and lots of other pallet wood tips at Funky Junk Interiors. Donna is the queen of pallet signs and projects (and queen of junk!). Love her!


Nashville Craiglist Barnwood for sale

3. Craigslist
  • I see Craigslist ads all the time for free wood. Check the ads in your area periodically for scrap wood from home improvement projects, floor installation, etc.  This is often a good way to get old wood.
  • Barnwood or old fence posts are usually sold, not given away. People are starting to catch on to the barnwood craze and are smartly making some cash off of their old wood.
  • Always be careful with your transactions (meeting up with people from online!) and be careful that you inspect the wood thoroughly before you hand over any money or load it up! You don't want filthy bug infested wood (unless you are willing to clean it up!) AND remember you're always taking your own risk at purchasing wood that you don't truly know where it came from.


This cute kitchen sign was made over a purple thrifted sign (source)

4. Goodwill, thrift stores, yard sales, etc.
  • Look for cheap ugly signs that are in good condition.
  • You can easily cover up over ugly designs, sanding down or painting over old designs.


Sign from fence posts (source)

5. Old fence posts and barnwood
  • Tearing down an old fence? Got a dilapidated barn nearby that your family or someone you know owns? See if you can salvage (with permission!) some of that gorgeous old wood!
  • Again, there are risks to this- rusty nails, splintered planks!


Signs made from scrap wood (source)

6. Scraps
  • Doing some home renovations or know someone who is? Use your old wood you're tearing out or scraps from new projects to make new signs, or ask your friends, neighbors, family what they are doing with theirs and if you can have some. They may be happy to have you take some of their "trash" off of their hands.
  • Use old cabinet doors, moulding, old windows, to make unique signs.


Help Wanted sign I made for my sis-in-law
(whose husband is Mexican and boys are blonde)
Don't really pay attention to what it says,
but the fact that a craft store plaque makes a great sign!

7. Craft Stores
  • Joann's, Michael's, Hobby Lobby, and maybe even craft sections of other stores carry lots of different shapes of wood plaques and signs that are ready to paint.
  • Don't forget to use mobile, newspaper, and home mailing coupons to buy things at these stores! There is almost always a great discount to be had from a coupon if wood items aren't on sale.


Sign made from driftwood.  You can't fake that weathered look! (source)


8. Driftwood
  • Stick shaped driftwood may not work, but I've come across several great pieces of wood that have washed up along the beach that were perfect for signs.
  • Flat dried palm tree trunk pieces that are beat around the shore are a great option too.


Beach Sign from Habitat ReStore scrap wood (source)


9. Habitat Restore
  • Check here to see if you have a local Habitat ReStore. They sell all kinds of items that are donated from renovations, some beat up items, some new or almost new in great condition. In your case, beat up old wood may be perfect!
  • You'll get a great price and help a great cause.


Of course, this is by no means an exhaustive list! Got any other ideas for where to get wood for your signs! Let us know in the comments!

See all my 31 Days of Making Wood Signs posts so far!

Thirty-one Days of Signs


Sooo, I’m starting up the business again getting back to making signs, and I thought I’d jump all in by joining in The Nester’s 31 days project! I know I’ll be among some great and intimidating company, and if nothing else this will be a spot for me to come back and look to for inspiration even if no one else ever reads it!!

For a little over a year and a half now, I’ve been making wooden signs, starting off  as gifts, then working onto creating a business Designs by Daisy, where so far I’ve sold at craft fairs and to some family, friends and friends of friends through posting my signs on Facebook.

I loooooove making them, and I’ve spent a lot of time searching ways to make them and finding inspiration from all over blog land.

My purpose in my 31 days topic is NOT to get you to buy my signs, but to share my methods and other methods out there that anyone can easily use to make their own, and to inspire you and myself with many different ideas by featuring different types of signs I’ve made and featuring different shops and blogs throughout blog land that share the same love of signs! Although if you are interested in any thing available that's great! Email me or see my Facebook page for current signs for sale! I'm currently only selling inventory, not custom made signs!

Here’s my plan so far for the 31 days:
(I’ll be coming back here and linking my posts up each day so that this is the landing place for all posts!)

Part 1 – Sign making supplies and methods
Part 2 – Beach signs (my favorite kind of signs!)
Part 3 – Random signs and features

Part 4 – Fall and Christmas Signs


Part 5 – Making signs as Gifts

Like I said, this is my tentative plan, and may change as I go along! I can’t even promise it’ll be 31 straight days, because I have this……

 
My three month old 

 
And this……

My two year old!
 

But I’m going to make my best effort to post as much as I can and hope you’ll follow along!
 
Check out The Nester’s linkup for all the others writing a 31 day series! There’s sure to be lots more great things to read!

  • Follow me on Facebook here, and Pinterest here or add me as a friend on Google Friend Connect (see the button on my side bar!) to keep up with my 31 day posts!