

So far, in this 31 day series we've discussed:
Finding your wood
Gathering your supplies
and
Making your own stencils
Today, we're going to talk about using pre-made stencils.
Stencils have come a long way. You can find all different kinds and designs in many different stores and online. They can sometimes be a pain to work with, so we'll talk about a few tips to make it easier.

I found these stencils at a yard sale so I can't recommend where to get them, but they aren't the typical block stencils that leave gaps in letters.
Here is the only sign I've made with them so far.....
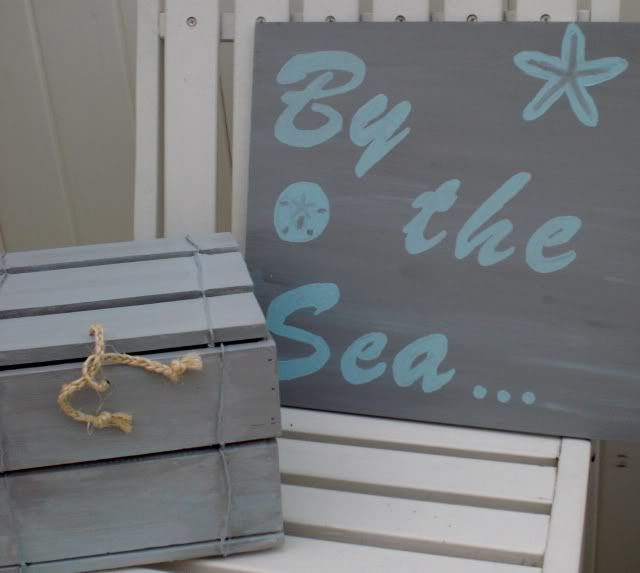
I put it above my kitchen cabinets to help start bringing in some of the grey that I just used to paint the dining room. I free-handed the starfish and the sand dollar because I didn't have the next set I'll show you yet.

These picture stencils I found at the Dollar Tree! Some of them are quite kiddish looking, but that may be the look you are going for anyways! I liked them for the beachy stencils!

Here is one little sign I made with these stencils and two wood shims glued together. I whitewashed the shims a bit to give it a beachy weathered look.
.JPG)
It is hanging in my guest room, here's a peek at my gallery wall in this room where I hung it.

Stacey at Embracing Change (I love her name, Stacey....teehee!) does a great job using stencils....here's one of my favorite projects she's done with them.


Here's my tips for using stencils.
- Paint your background your desired color(s) first.
- Prep your stencils with a little bit of spray adhesive if you are working with a rougher wood, if you let it dry for a bit, it should be tacky and not wet and not leave a residue on your sign.
- Place your stencil and tap the paint on with a foam brush or a brush specific to stenciling, don't use strokes as you can push the paint underneath your stencil.
- Use as little amount of paint as possible! Better to do it twice than to use too much and have it seep under.
- Remove your stencil smoothly so you don't drag any paint.
- If your next letter/design will make the stencil edges overlap your first....wait for the first to dry.
- If you have to use the same letter/design more than once, wipe it dry, or wash it off so you don't smear the previous paint onto your sign. You can also wait for it to dry but if you get too much dried paint around the edges, it may start to not lay flat.
- Distressing can help hide (or sand away!) mistakes.
- Touch up with your background color if any of your letters get too messy. You could possibly even repaint over a section and go back and re-do whatever part messed up without having to redo the whole thing.
If you use stencils like the ones in Stacey's sign I showed above, and if you have a steady hand, you can always go back and fill in those little lines to make your letters look more complete. Sometimes the look of stenciled letters can be cute, and sometimes you want a more finished look.
Check out the rest of my 31 day series on making signs here:
I sometimes link up to these lovely ladies' parties:
No comments:
Post a Comment
Let me know what you think!!! I'd really love your comments!! Thanks for visiting me!!