

Now that you’ve got your wood selected, what else do you
need?
Paint

My stash of oops paints!
1.
Latex paints
· Buy oops paint from home improvement stores,
usually near the back of the paint counter. They are paints that the color wasn’t
made correctly so customers didn’t buy them and they are heavily discounted so
they’ll move out! Sample pots are $.50- $1.50, quarts are usually $3 or less,
and gallons are usually under $5
· You could use oil based paints, but they don’t
clean up easily so I like to stick to latex, plus you’ll find latex in oops
paints more often!
· If you need a specific color, a sample pot for
about $3 will last for a long time for sign-making.

My spray paint stash
2. Spray Paint
· Don’t bother with the cheapo $.99 cans! You’ll
end up using a lot more, and they don’t work that well! Trust me, I’ve tried
them out! Especially the white is bad….terrible coverage. The black from Walmart is horrible, but the
black $.99 cans from Home Depot are ok.
If you are doing something small, they may work for you, but I really do
recommend going for better quality.
· Rustoleum is my FAVORITE (from Home Depot). I’ve never had a problem with drips, coverage,
etc! It’s the brand I usually use, but I do hear good things about Krylon and
Valspar- especially Krylon.
· It’s your fastest option. You are limited in
color choices with spray paint, but painting signs goes SOOO quickly! If I’m
doing several in the same colors, I’ll do them all at once!
· If you use contrasting colors and don’t go too
heavy on the top layer, you can easily distress to see the color below.
· Your best option for purchasing these is at Home
Improvement stores. Even with coupons, they are usually more expensive at a
craft store like Hobby Lobby or Michael’s.
· Even though spray paint is probably my most
expensive option I use for paint, it’s totally worth it when I can blast
through several projects at once. I use spray paint for way more than just
signs!
· Always use precautions, paint in a well-ventilated
area and use a mask. Also read the can to be aware of the best weather conditions
for spray painting! They are for a reason! This is why it’s good to have other painting
options because when it’s too hot or too cold, spray paint can look awful! It’s
also nice to have other options when you are pregnant, like I just was! Even
with a mask it’s not a good idea!

3.
Acrylic paints
· Find these small bottles easily at craft stores
or places like Walmart.
· Look for bottles on clearance, on sale, or use a
craft store coupon. They are usually
pretty cheap to begin with, but cheaper can’t hurt, right?!
· These are a great option when you only need a
small amount of a specific color because some brands are around $1!
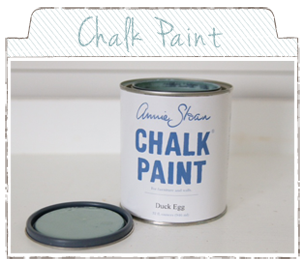
4.
Chalk paint or milk paint
· If you aren’t much of a home décor blog reader,
these paints might be new to you. If you’ve
been around this blog circle for even a little while, I’m sure you know all
about it and can skip my descriptions!
· Chalk paint- Annie Sloan Chalk Paint, CeCeCaldwell’s Chalk & Clay Paint are the biggest kids on the block, and there is also Masion Blanche a new one I don't know much about but hope to soon. It’s mostly used for
furniture, but it distresses so easily that it’s perfect for signs! There’s no
prep work involved (which is why it’s so great for furniture, other than
sanding splintery edges or cleaning up old wood, there’s not usually much prep work for signs.)
· There are also DIY versions which I’ve never
tested on furniture, but have used for signs and I love this post which
compares Annie Sloan and DIY. I’ve also used CeCe’s for a few small projects
and am about to use it for my dining room table.
· Milk paint- Miss Mustard Seed can tell you all
you need to know about milk paint, and she’s
made some signs with it. It’s a powder based paint that you mix with
water. She has just come out with her
own line and I’m hoping to get my hands on a sample soon. It’s supposed to
distress really well too and not require much prep. Again mostly designed for
furniture but also great for signs.
5.
Stains
· Use one of the above options for lettering or
other designs, and use a stain before or after.
· I’ve used several oops stains for different
signs that turned out great. I especially like it on fence post signs.
· Use a pickling stain (for a white color)

6.
Sealants
· I’m including these under paints because they
are found in the same aisles! If you want a time or weather worn sign and don’t
mind it getting any abuse (if it will at all, most signs should be out of the
way!), you can seal it with many different options.
· Polyurethane- this can be found in a quart or in
a spray can. I do seal my signs that I
sell and I use this most often in spray form, because it’s quick and easy. It will most likely YELLOW WHITE PAINT! I
learned that the hard way. Supposedly if you do several very, very thin coats
won’t, but I haven’t tried it ever since I found some of my signs yellowed,
fortunately I often used white as the lettering color and they didn’t get hit
to hard.
· Polycrylics- these shouldn’t yellow your white
paint and come in spray and quarts. I’ve done a lot of research on the two and
apparently it can yellow sometimes but shouldn’t if you get a sealant that is
water-based and does not contain “urethanes.”
Other supplies
These will vary on the type of sign you are making, and this list is
just somewhere for you to start. I’ll update the post on ways to make signs
next to the different supplies after we go over them this week!
·
A craft cutter- Cricut, Silhouette machine etc.
·
Printer- Ink jet for transfer projects, laser for
tracing or making your own stencils is fine
·
Vinyl or contact paper
·
Exacto knife to cut your own stencils if you don’t
have a cutter
·
Pencil for pencil transfers, sharpie to free hand or fill in letters.
·
Carbon paper and tracing utensil
·
Twine, ribbon, drill to make holes for threaded hanging, or sawtooth hangers
·
Paint brushes – cheap foam brushes work well and
if you wash them immediately, you can
often use them again. For some techniques
you may want to invest in good brushes like a
Purdy brush (they don’t lose
their bristles!)
·
Sand paper- low grit (60, 80) for sanding
splintery edges and smoothing a really rough
surface; high grit (180 +) for
distressing. I don’t think you need a sander just for signs. It
can make things go faster, but you can
also sand too quickly and sand too much!
·
Newspaper, drop cloth, old sheets- something to
cover your work surface
·
Paper cups, paper plates- I use these to mix my
pants and to create a palate of blended
colors.
· Spray adhesive, mod podge, painter's tape and/or glue stick to hold stencils in place
colors.
· Spray adhesive, mod podge, painter's tape and/or glue stick to hold stencils in place
Got any other supplies you use to make signs? Leave a
comment! I’ll be adding in some more supplies as we go over methods throughout
the week!
Check out all my 31 days of signs posts so far!
Wow! You really know your stuff!
ReplyDeleteWow! You really know your stuff!
ReplyDelete